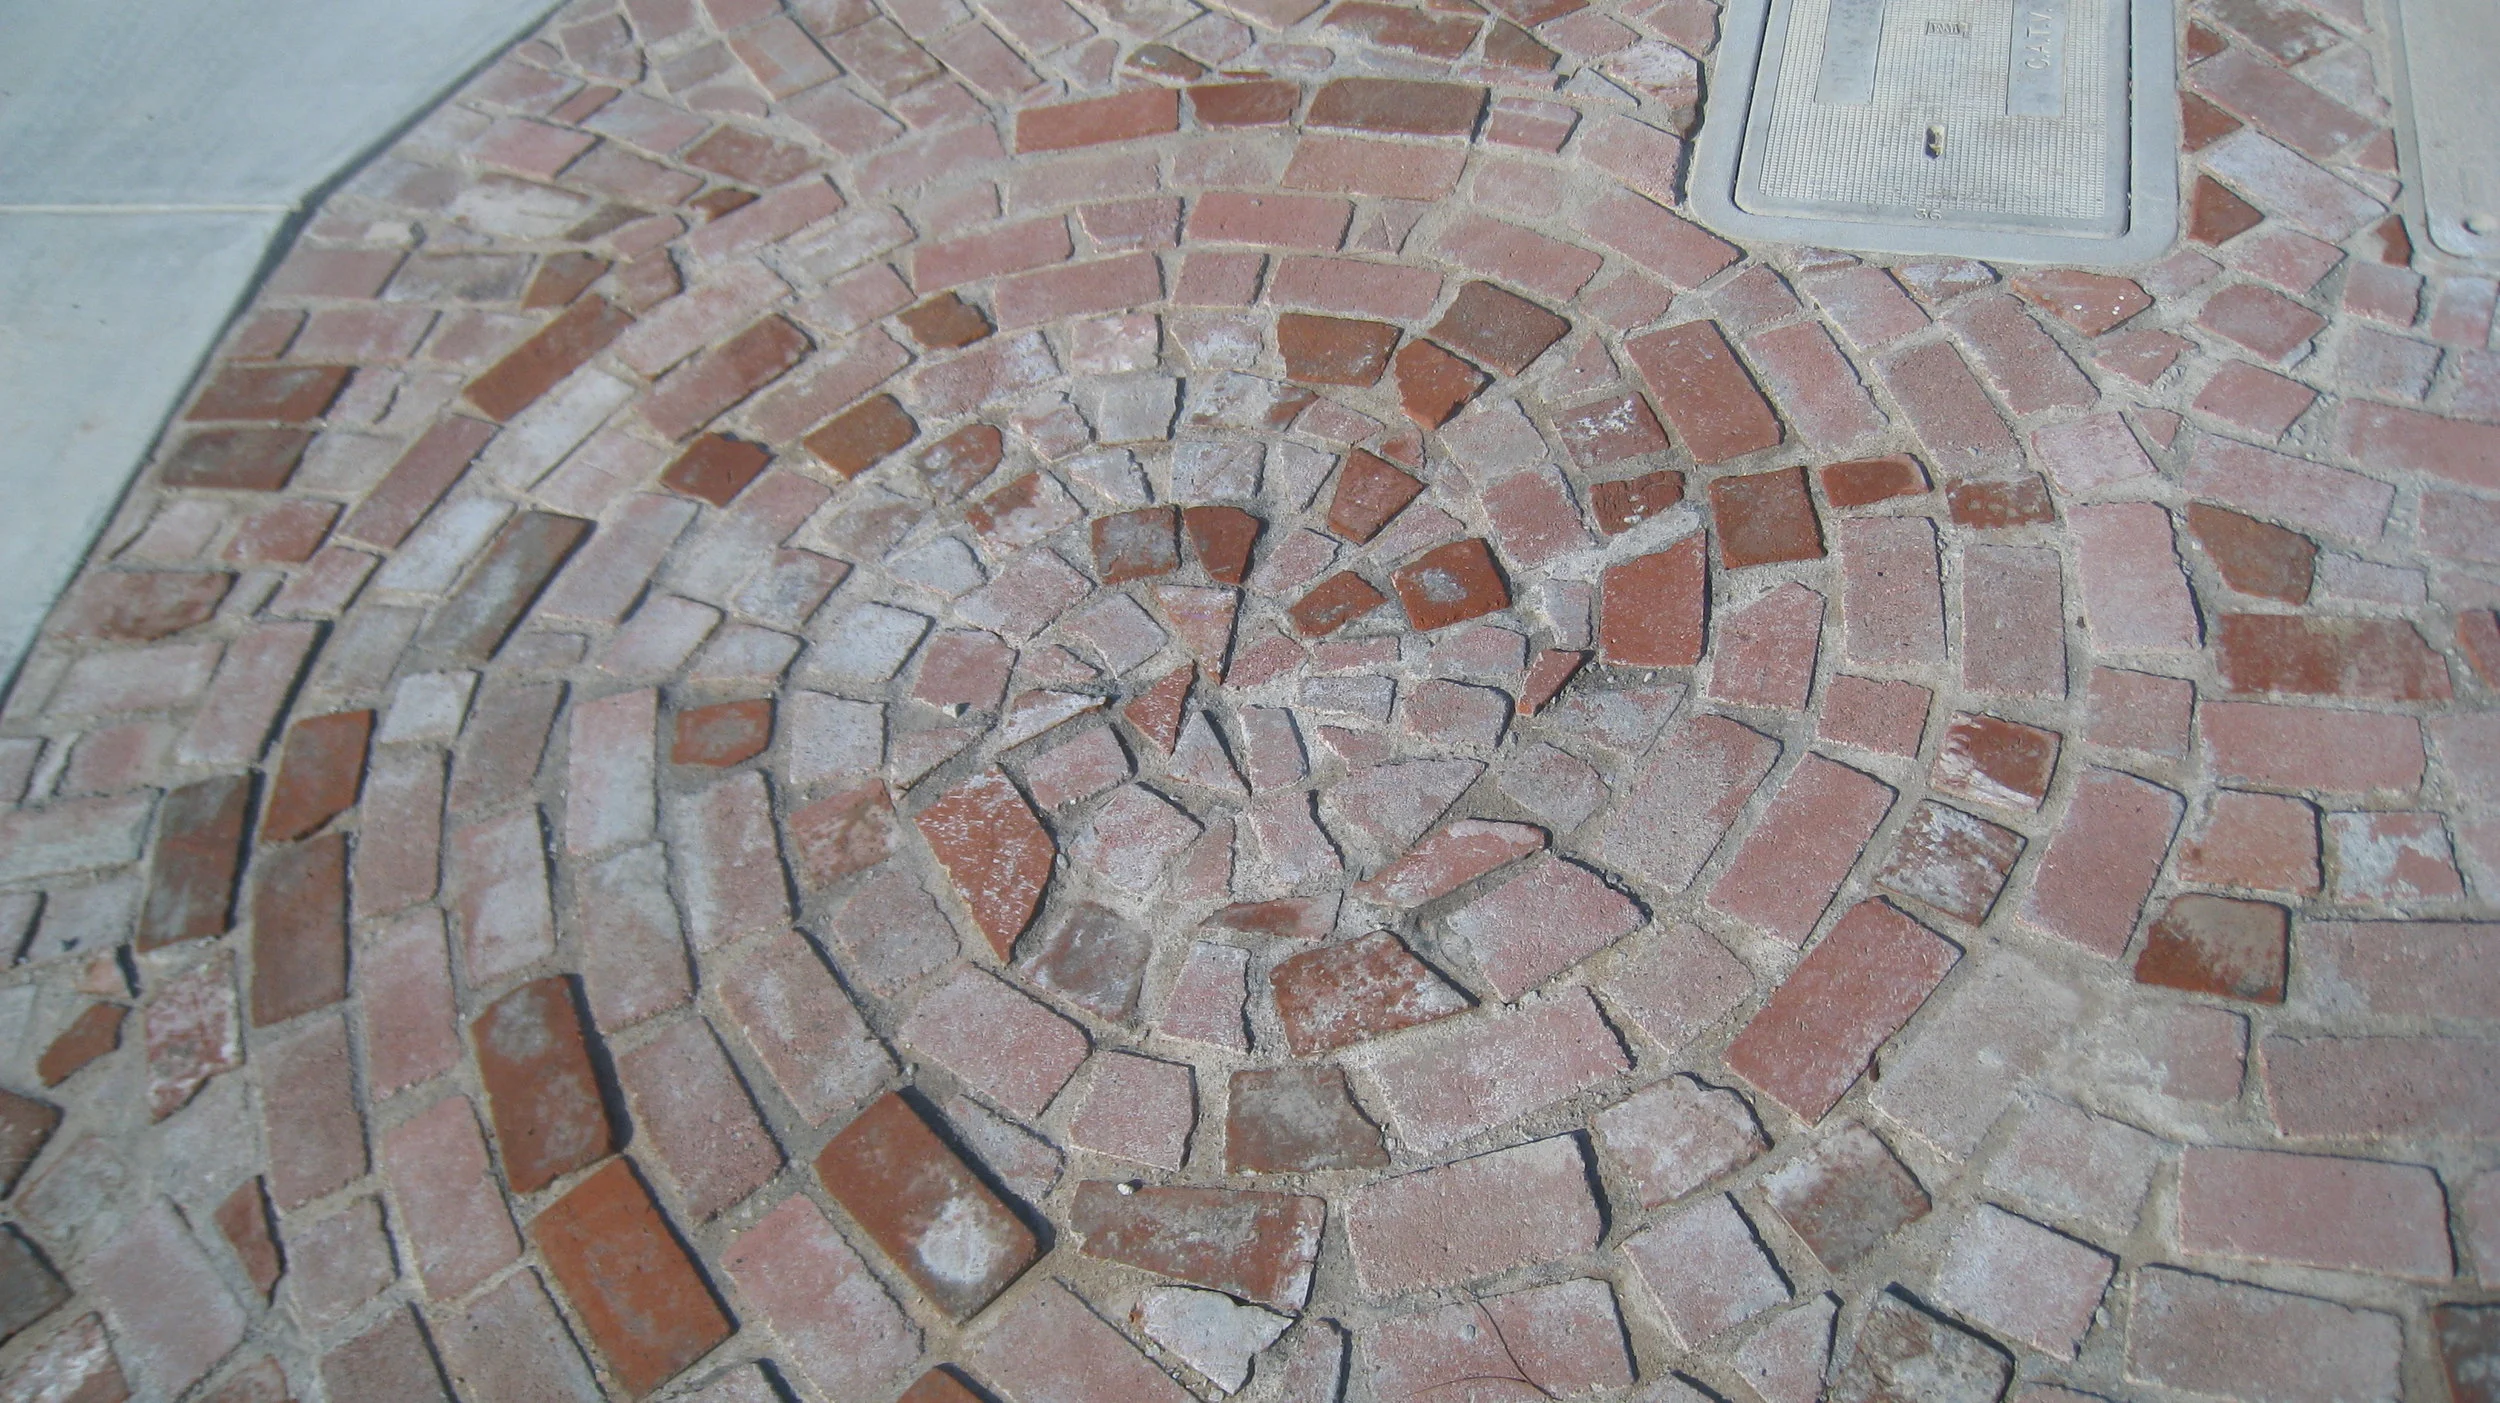
DIY: Make Pathways From Used Brick
/

DIY--Basic steps to make attractive walkways from reclaimed brick:

Start by raking to remove all weeds and debris.

Level the area at the depth of the bricks. If you have expansive soil, you may want to put down a couple of inches of sand.

Place bricks around the border, and then start a pattern with some random curves.

Fill in the pattern, using a 5/8" to 3/4" gap around the brick on all sides. Don't be afraid of using half bricks and broken pieces--it comes out looking better that way. I use a hammer to break the brick when I need angle pieces (you can score the back with a tile saw if you are having a hard time breaking them)--use safety glasses.

Next, mixdry sand and portland cement 50/50, and spread it over the brick, pushing it down into the cracks. (UPDATE 11/03/12 -- I have been using ready-to-use "Quikrete" instead of the portland/sand mixture, and it works just as well. Just be sure that you have at least 5/8" - 3/4" gap between the bricks because this mixture has little rocks (agrregate) in it.)

Pack the sand/portland mixture down into the cracks. I use a narrow stick or just my gloved fingers.

When all the cracks are filled, gently sweep away the extra dry cement mixture. Don't get too aggressive with the broom, you want to leave the cracks full of the mixture, and the dust that you see on top is not a problem.

Finally, use a hose to gently spray the pathway, cleaning the tops of the bricks and moistening the cement mixture. Don't go overboard with the hose or you'll wash away your cement. Just spray off the dust on top of the bricks. After it sets over night, go ahead and spray it again. Spray it down once a day for the next two days. Enjoy your new path!
Other projects from benriddering.com: